Key Takeaways
- Figma’s typography variables let designers manage fonts efficiently across projects.
- String variables control font family, style, and weight for consistent text.
- Number variables manage font size, line height, spacing, and other measurements.
- Variable modes enable responsive typography for different devices and screen sizes.
- Typography variables improve scalability, flexibility, and maintenance of design systems.
Typography lies at the heart of visual communication that shapes the way we perceive and interact with design. If you are a Figma user, you should get excited as Figma is now offering variables for typography that let you apply string and number variables to font properties.
With this groundbreaking feature of Figma, you can now effortlessly manage font properties, from family and weight to size and spacing. This innovation, at the same time, simplifies the design process and enhances scalability and consistency within projects.
As it's the latest feature Figma release, many of you may not know how to implement the feature. However, don't worry. In today's discussion, we'll intricate the process of implementing typography variables in Figma in a step-by-step guide.
What Are Variables for Typography?
Typography variables are placeholders that let designers define and manage typographic properties systematically and efficiently. Rather than manually adjusting each text element individually, variables let them make changes to typography globally by simply updating the variable values.
Advanced designing tools like Figma preset these typography variables to enhance workflow efficiency and ensure consistency across design elements.

So, designers can centralize typographic properties into variables to maintain and update typography styles throughout a project. It simply saves their time and reduces the risk of errors.
Typography variables in tools like Figma usually have many different types. But for this type, you have to use mainly two of its main types:
String Variables
These variables are used to define text properties like font family, font style, and font-weight names. By assigning string variables to text elements, designers can easily change the font family or style across multiple instances. As a result, there is no need for manual adjustments at all.
Number Variables
Number variables, on the other hand, can be implemented for numeric values associated with typography, like font size, line height, paragraph spacing, and letter spacing. They provide flexibility in adjusting these properties universally. This variable simply ensures visual consistency throughout the design.
How to Implement Typography Variables in Figma
As the typography variables are the latest edition in Figma, many users are not properly aware of how to use it. However, we have used these variables and learned the process already.
Here, we have elaborated the entire process dividing it into simple steps so that beginners will find them easy to understand.
1. Create a Variable Collection
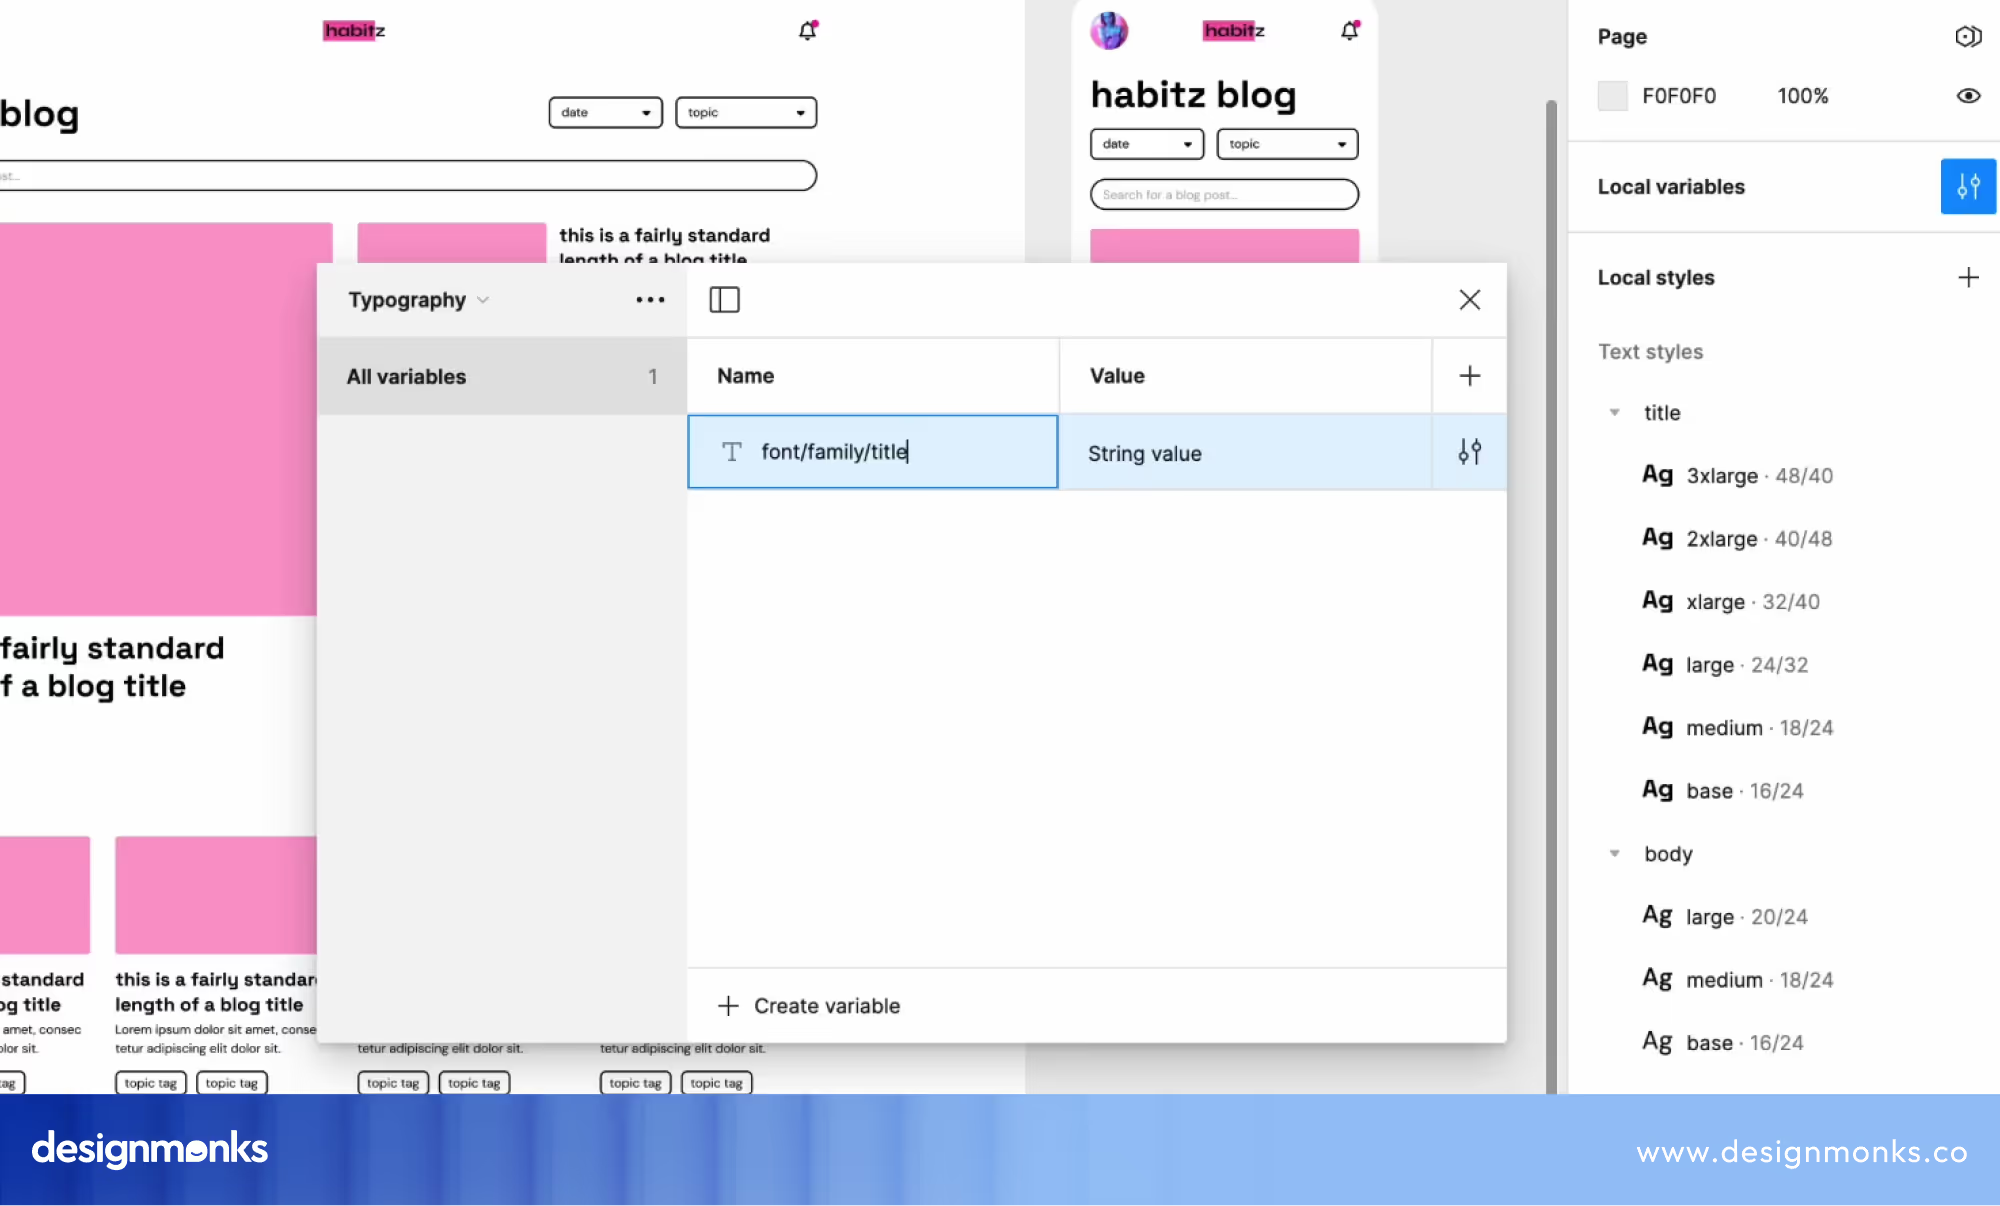
From the menu of the Local Variables, you can create a new variable collection. Now, name your collection appropriately, for example, 'Typography Variables'. You can name it based on the project you are working on.

2. Create String Variables for Font Families
Within your Typography Variables collection, click on the "+" button again to create a new variable. Make sure to name the string as well. Also, choose the String type for font families.
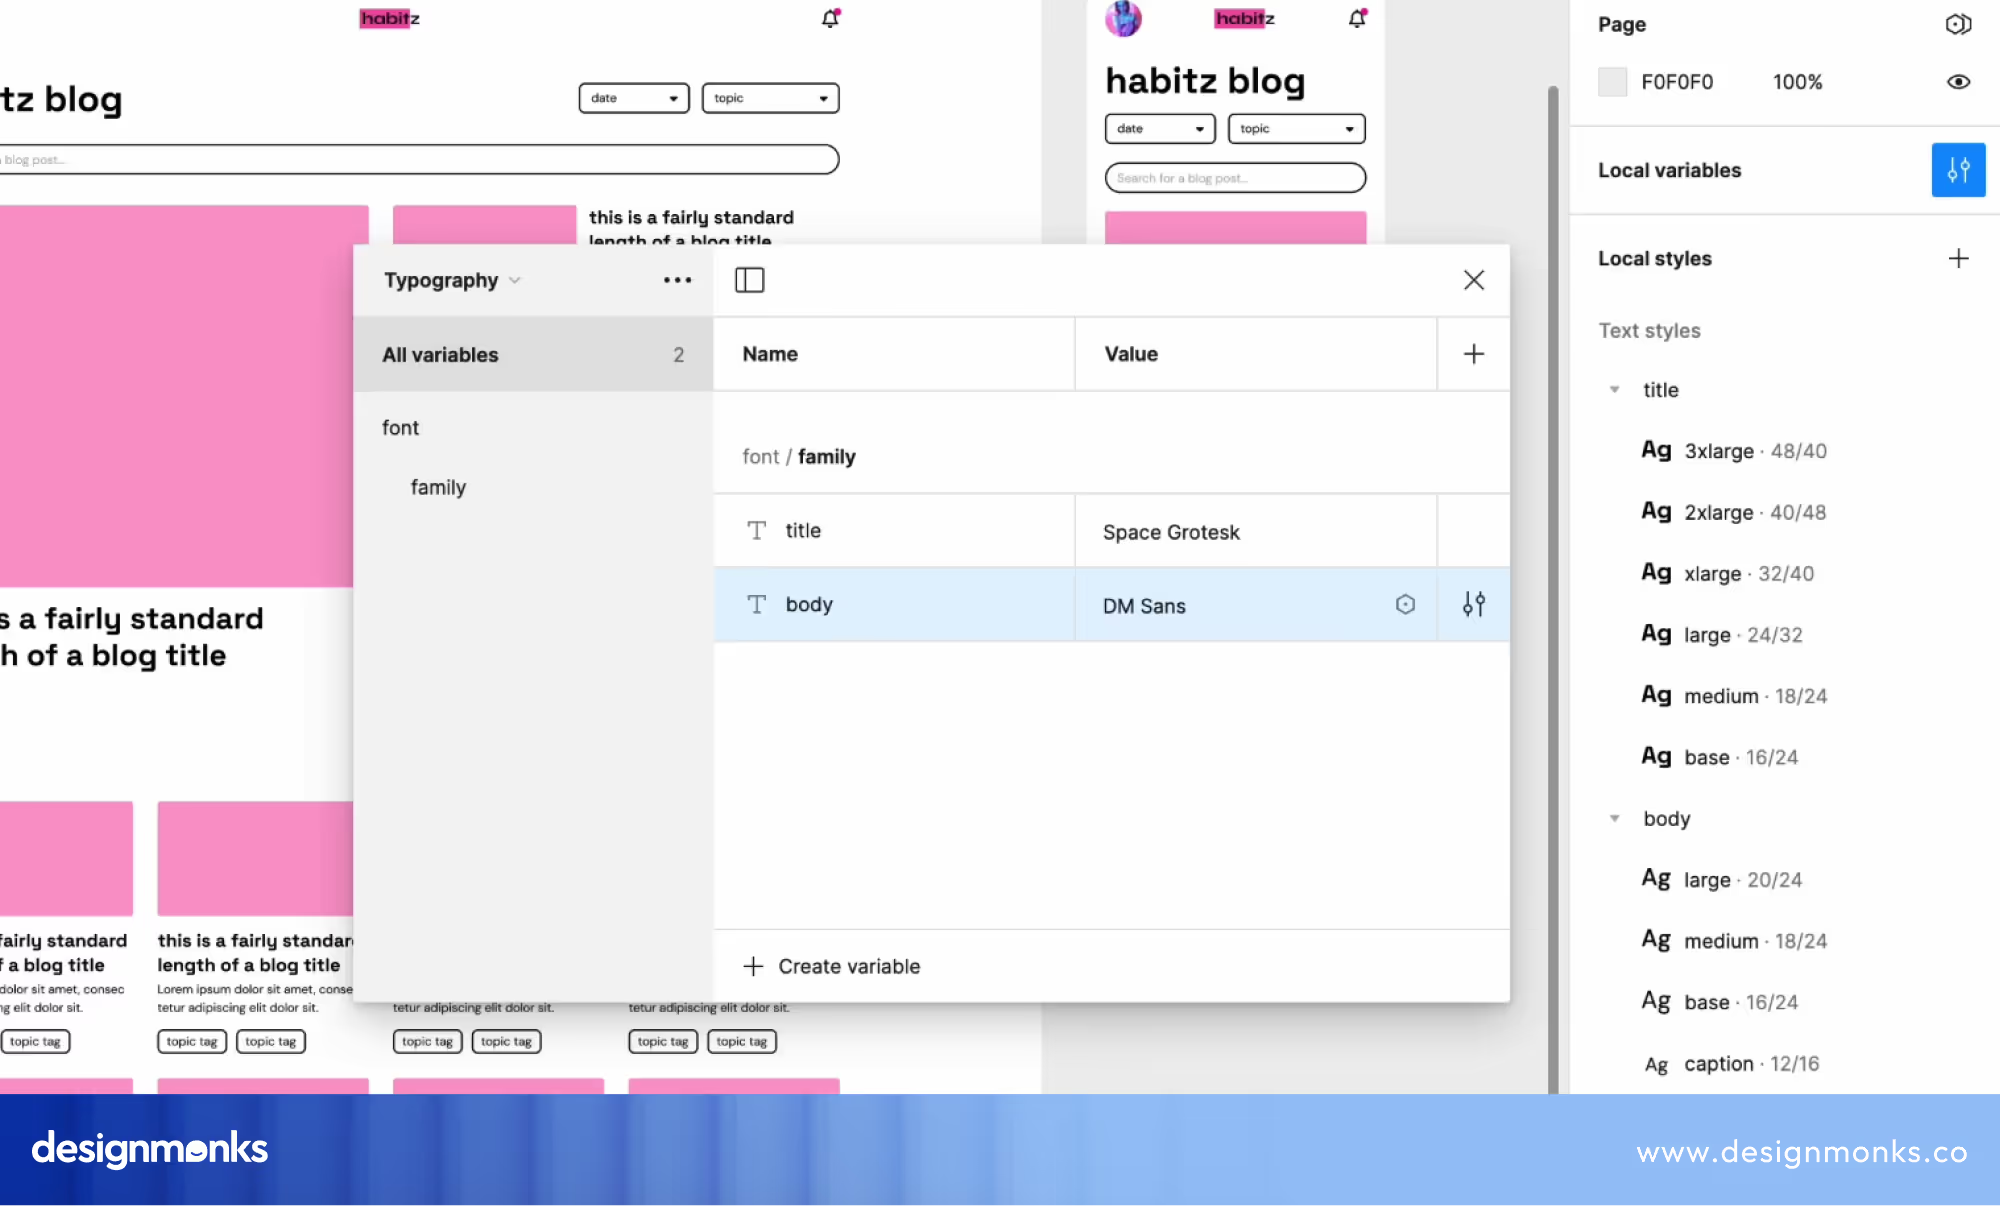
While naming the string, it's better to be a little more descriptive, like 'Font Family Title' and 'Font Family Body'. Here, the last parts that mean Title and Body are actually the names of the variables whereas the first two parts describe the group name.
However, once the name is ready, you need to specify the font family names, for example: "Space Grotesque" for titles, and "DM Sans" for body text. In this case, you can write the names with or without spaces, user cases, hyphens, or underscores. These changes won’t affect the process.
3. Create the Second Variables
Now, you will need to create the second variable. Well, don’t worry. You don’t need to start from the beginning. Instead, just press Shift+Enter and it will automatically create a duplicate variable that you’ll find right under the first one.
The second one will be the same as the first one. Make sure to name this variable as well. Otherwise, you will find it difficult in the future to mark the exact variables.

4. Implement Variables in Text Styles
In this step, you need to identify the text styles you want to apply the variables to, such as title styles and body text styles. For that, select a text layer or a text style in the canvas or the Layers panel. Open the Edit Text Style in the right sidebar.
Now, click on the arrow next to the font family dropdown to expand the options. Here, you'll get a model available for the String Variable selection.
Select the appropriate string variable you created in the second step. For example, Font Family Title for title styles and Font Family Body for body text styles.
However, once you select the Variables, you will find it on the family dropdown. Here, the part for the font family is done. So, you need to repeat this for the remaining Title Text Styles and also the Body Text Style.
At this phase, you still have the option to change the font family style for the last time. If you need that, just go to the Variable Collection and change the font family name to a different one.
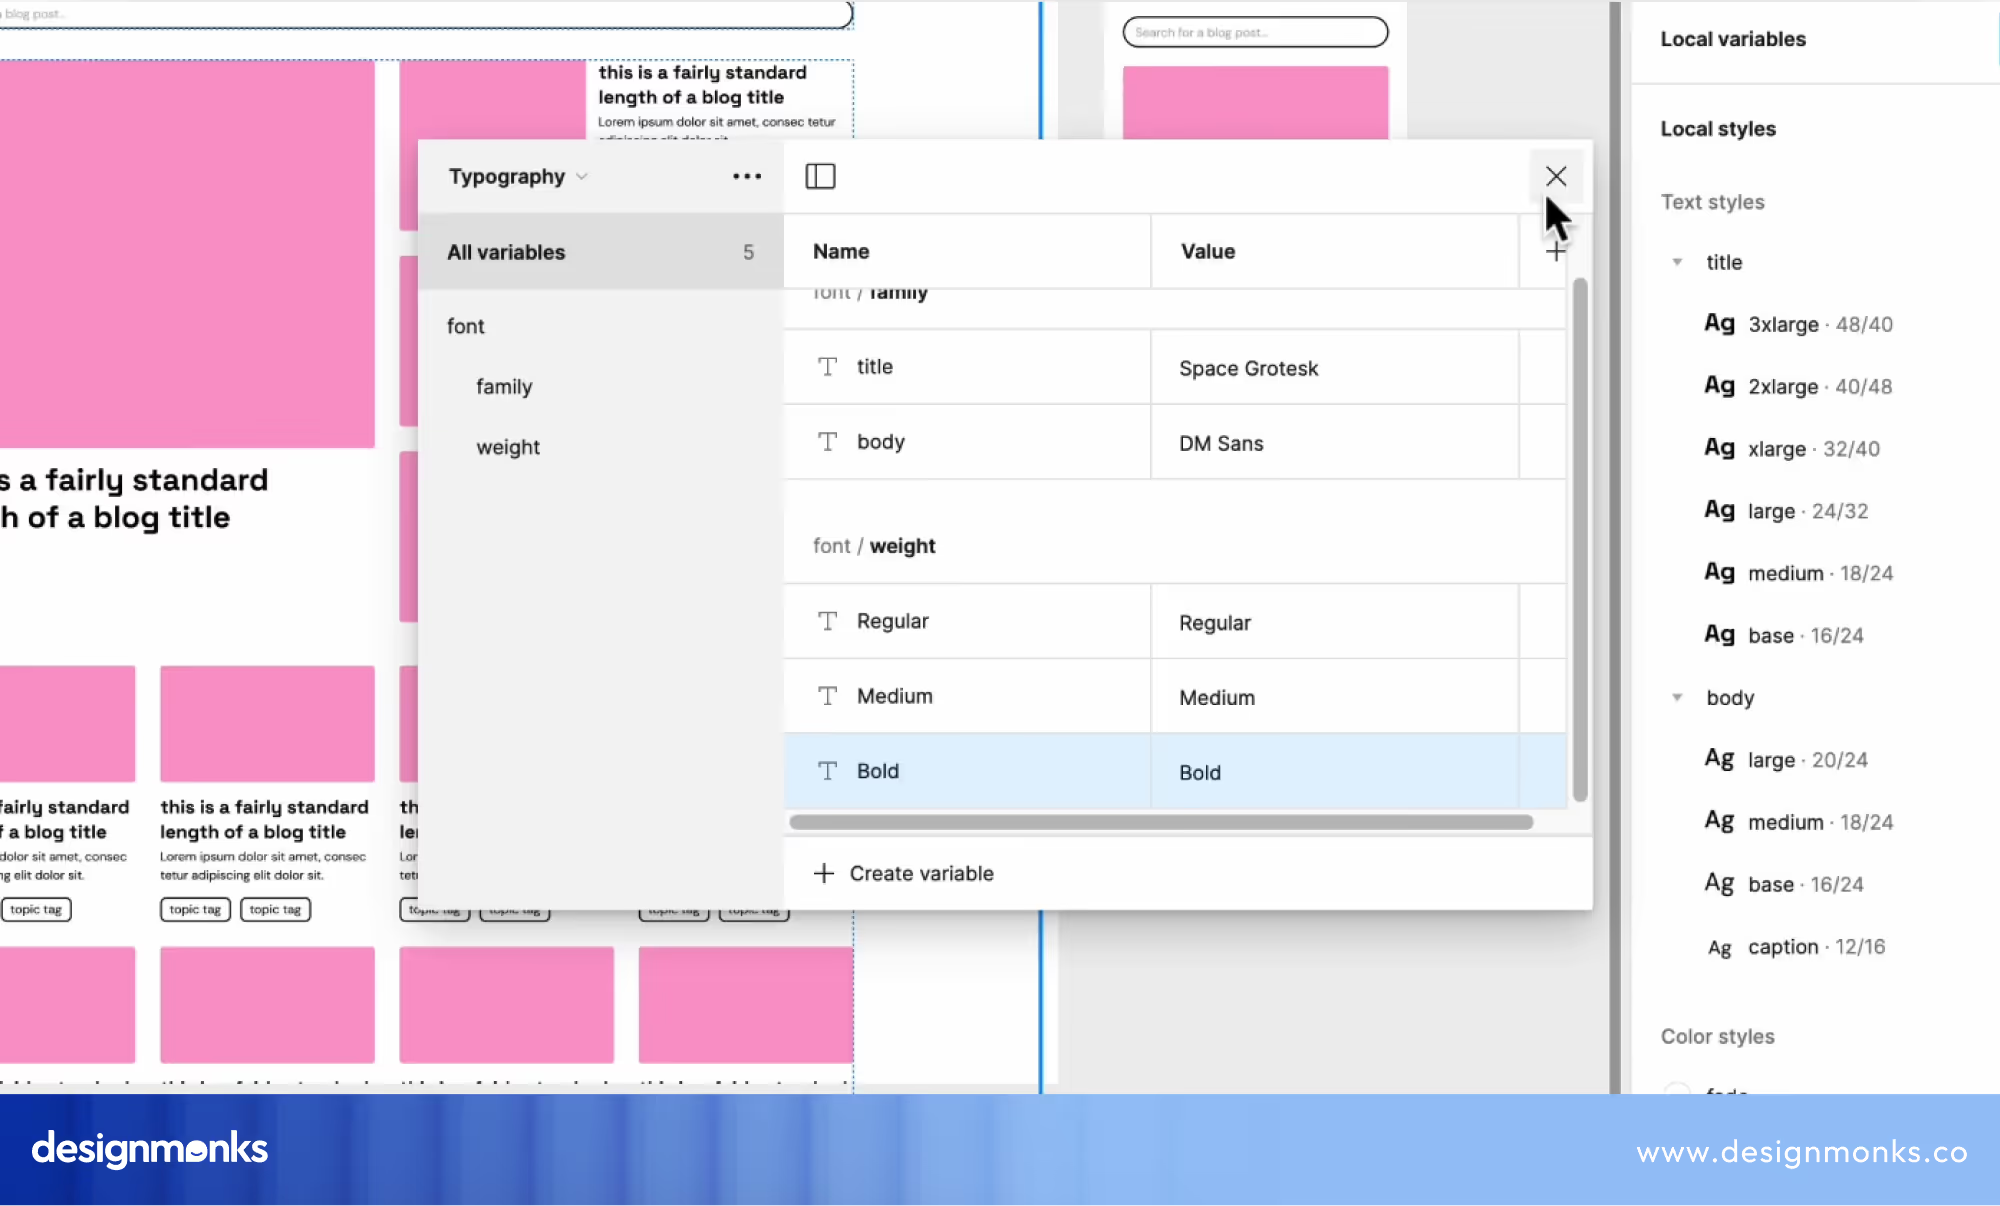
5. Create String Variables for Font Weights
Usually, the font weight is the thickness or boldness of characters in a typeface. It indicates the visual density or thickness of the strokes that make up the letters, numbers, and symbols within a font family.
Here, if you lower the weight number the text will be thinner, Consequently, if you higher the number, the text will be thicker. Still, the number of the font-weight can have different interpretations. For sure, 800 and Extra 800 are not the same.
You can use either number variables or string variables as you wish. However, if you use number variables, choose the font weight's numeric value. On the contrary, choose font weights named Alias or any other option you prefer for string variables.

Now, you can create the string variables. The process is the same as before. Make sure to name your variables descriptively like Font Weight Regular, Font Weight Medium, Font Weight Bold. Here, the text value must be Regular, Medium, or Bold.
6. Implement Font Weight Variables
For each text style, repeat the process of applying variables, but this time for font weights. Open the font-weight dropdown in the Text properties and apply the appropriate string variable you created for each style.
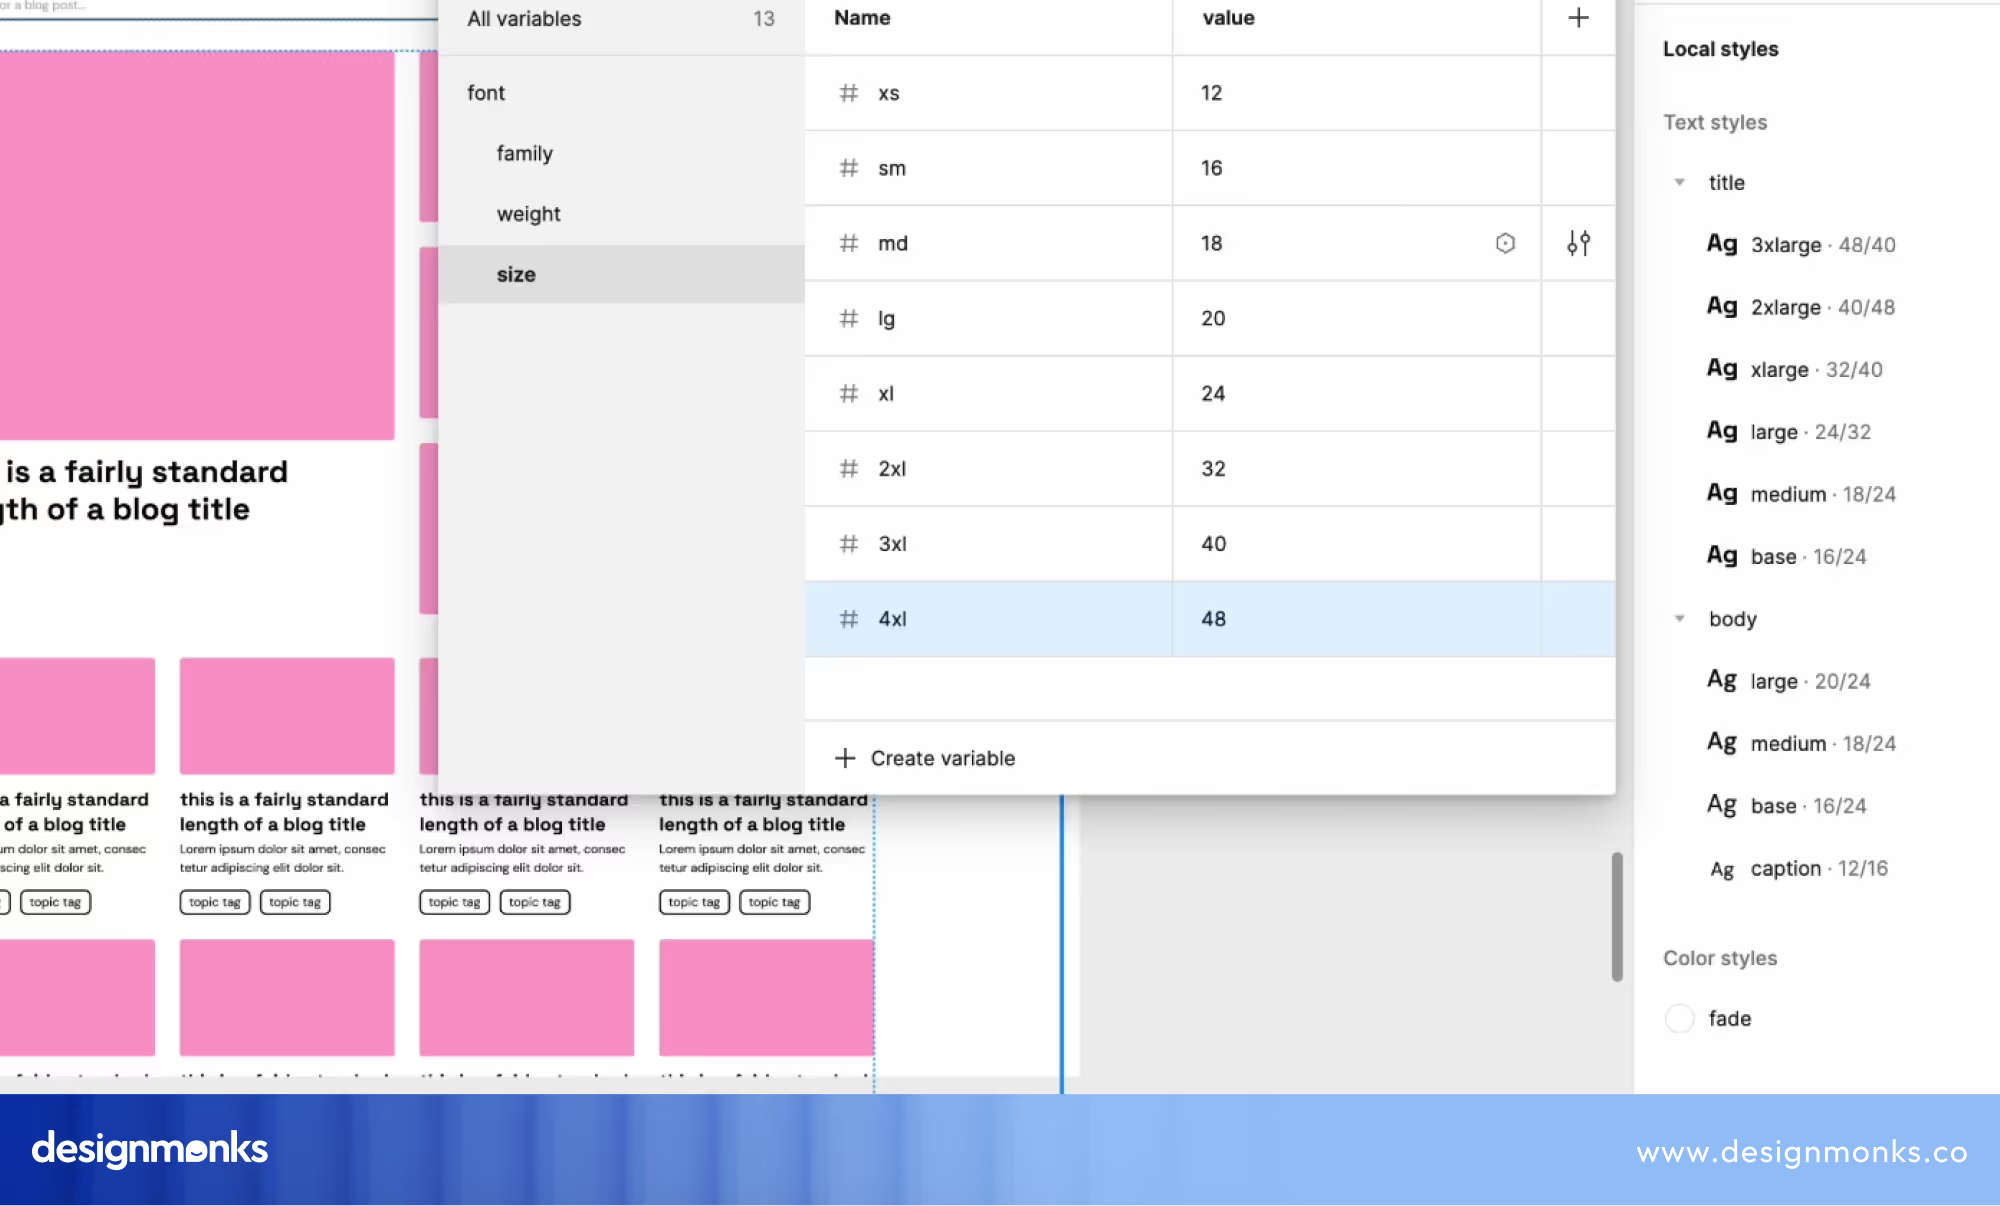
7. Create Number Variables for Font Sizes and Line Heights
Font size and line height are essential typographic properties that influence the appearance and readability of text in design compositions.
Here, Font size refers to the measurement of the height of characters in a typeface That is usually expressed in points (pt), pixels (px), or ems (em). Line height, also known as line spacing or leading, is the vertical space between lines of text.
however, if you want to control font sizes and line heights with variables, create a number of variables following the same steps as above.
Name your variables descriptively. It can be like Font Size XS, Font Size XL, Line Height XS, Line Height XL, etc. Don't forget to specify the numerical values for font sizes and line heights.

After selecting the variables, back to the style and click on the variable icons from the font size dropdown. For the font size group, select the right variables.
Then move to the Line Height and click the variables icon again. Select the group from this table and apply. Finally, do the same for the remaining text styles.
8. Using Variable Modes for Responsive Design
If you want to create different values for different contexts, like mobile vs. desktop, use variable modes. You can create multiple modes within your variable collection, like Mobile and Desktop.
Also, make sure to specify different values for font sizes, line heights, etc., for each mode as needed. Don't forget to apply variable modes to text styles or components to switch between different sets of values based on the context.
These are the easy steps you can follow to effectively use Figma's typography variables to create consistent and scalable typography systems within your designs.
Benefits of Typography Variables in Figma
Many designers actually don't love to come out of their comfort zone and try something new. That's actually a big threat on their way to picking the Big Apple.
However, if you are one who is very comfortable with the traditional typography style, you should at least check the benefits of using typography variables.
Streamline Design Management
Typography variables let designers centralize and organize font properties, like font family, weight, size, and line height, within a single variable collection.
They can consolidate typography variables to efficiently manage and update text styles across their projects. So, there will be no need to go for the manual adjustments anymore.
Enhance Efficiency
With typography variables, designers can make global changes to font properties by simply modifying the values of the variables. They no longer need to manually edit each text element individually.
This streamlined approach saves time and effort and lets designers focus on creative exploration and iteration rather than repetitive tasks.
Makes Customizing More Flexible
For the most possible flexibility, you should use these variables, especially in customizing text properties to suit their design needs.
Designers can easily experiment with different font families, weights, sizes, and line heights by adjusting the values of the variables. As a result, they can easily achieve precise typographic effects and visual aesthetics.
Improve Scalability and Maintenance
As design projects scale in complexity and scope, typography variables offer scalability and ease of maintenance.
You can efficiently scale typography systems across multiple screens, devices, and platforms. Also, it facilitates future updates and modifications as design requirements evolve.
Help in Making Responsive Design
Figma's Typography variables play an important role in responsive design as it lets designers adapt text properties dynamically to different screen sizes and orientations.
As a designer, you can utilize different variable modes to define context-specific values for font properties. It'll ensure optimal readability and usability across various devices and viewport sizes.

FAQs
Can typography variables be applied to text layers as well as text styles?
Yes, typography variables can be applied to both text layers and text styles in Figma. Designers have the flexibility to customize font properties for individual text layers or apply consistent typography styles across multiple text elements.
What type of axes does Figma's typography Variables have?
Figma's typography variables include two axes: string and number. The string axis enables the application of variables to font family, style, and weight names, while the number axis supports numeric values for font weight, line height, font size, paragraph spacing, letter spacing, and paragraph indent.
Can typography variables be utilized for multilingual design projects?
Yes, typography variables enable designers to adjust text properties based on the language being used. Designers can incorporate variables into text styles to manage multilingual designs and ensure appropriate typographic adjustments for different languages.
Wrapping Up
For sure, the introduction of typography variables in Figma represents a significant advancement in design efficiency and consistency. You can now utilize string and number variables to seamlessly manage font properties, adapt typography styles to diverse design contexts, and streamline maintenance tasks within design systems.
No matter whether it's a multilingual project or a collaborative workflow, typography variables offer versatility and flexibility for designers to create cohesive and accessible designs. So, don't forget to thank Figma for this groundbreaking feature.

.svg)


.avif)
.avif)
.avif)
.avif)


.avif)
.avif)
.avif)
.avif)


.avif)


